

How To Remove A Graphics Card
There are a variety of reasons why you would want to remove a GPU from your current PC setup.
Maybe you would want to upgrade to a better GPU, maybe the GPU is faulty and you would want to change it with a new one.
Perhaps you would want to clean your GPU because information technology has been installed for quite a long time, or maybe you lot would want to downgrade since you lot do not need all that power currently installed in your PC and would want to lower your electrical bills and earn a bit of extra cash by selling the better GPU.
There's a variety of reasons indeed.
In this guide, we will exist going through a footstep-by-footstep process on how to remove a graphics card from your PC and make way for your new or spare GPU or if you would just want to give information technology a bit of a clean-up.
How to Remove a Graphics Card
1. Remove Existing GPU Drivers with Display Driver Uninstaller (DDU)
If you are only cleaning your GPU or if you are replacing your GPU with a GPU that is similar to your current one, you can completely skip this step as you will be using the same drivers every bit earlier.
Before we start doing annihilation physical to our PC and yanking out the GPU, nosotros would start want to set up our PC (software-wise) to receive a new GPU. Display Commuter Uninstaller (or DDU for curt) is a program that uninstalls any previous GPU drivers that could be found in your PC.
This program ensures that the installation of a new GPU driver goes by smoothly as any remnants of the one-time GPU driver could potentially crusade errors with your new GPU or when installing the drivers for your new GPU. This is especially true if you are jumping from one make of GPU to a different one or if y'all are upgrading or downgrading your current GPU with 1 that spans a couple of years.
To download DDU, just head on over to Guru3D for the download link. The site itself also has instructions on how to use the program, and if yous somehow miss those instructions, the plan itself has instructions too. So just follow those instructions and y'all will have a painless time switching drivers and your PC will cheers for information technology.
ii. Close Downwards Your PC
Assuming you already have your PC shut downwards, you can also skip this step.
Now that your PC is running on its operating system'due south very ain display drivers and your PC is essentially clear of any old third-party GPU drivers after the mandatory reboot from the DDU program, y'all may at present shut your PC downwardly to formally outset the teardown process of this guide.
3. Unplug Your PC's Wires and Prep Your Workstation
Now it is time to get a scrap physical. Now that your PC is turned off, you may now disconnect your PC's wires from their sockets and proceed to prep your PC for its teardown. Bring your PC over to a clean and clutter-gratuitous area like your personal workbench or a tabular array big enough to accommodate the PC tower.
You may also set your working station on the floor, but this is only if you accept absolutely no other area to piece of work on. Just brand certain that your floor is clean and dust-free and has a mat that could act as a piece of work expanse. Information technology is always advisable to have your tools and materials organized so that you do not end upwardly losing anything essential to your PC like its screws for the case or the housing of the GPU itself.
iv. Call back to Footing Yourself Before Starting Piece of work
This step is more of a constant reminder than a specific step, but whenever you do work on the innards of your PC you would want to basis yourself to avoid shorting any component out because of static build-up that naturally occurs to yous when you drag anything beyond the floor or table.
To ground yourself, but touch any metal object on your PC case for the static to belch onto that. The best thing to bear upon is the example of your power supply, only you tin likewise affect your PC's instance.
Ever arrive your best practice to ground yourself before touching anything inside your PC (specially if you observe yourself moving around a lot) every bit it can relieve you a lot of headaches in the long run!
If you think that you lot might forget doing this footstep from fourth dimension to time, yous tin can likewise habiliment an anti-static bracelet, which is a bracelet with a ground cable fastened to it. Only wrap information technology around your wrist or your ankle and clip the alligator clip to the computer's ability supply case. This ensures that y'all are ever grounded and that your body does non produce any static electricity.
5. Remove Your PC's Side Panel
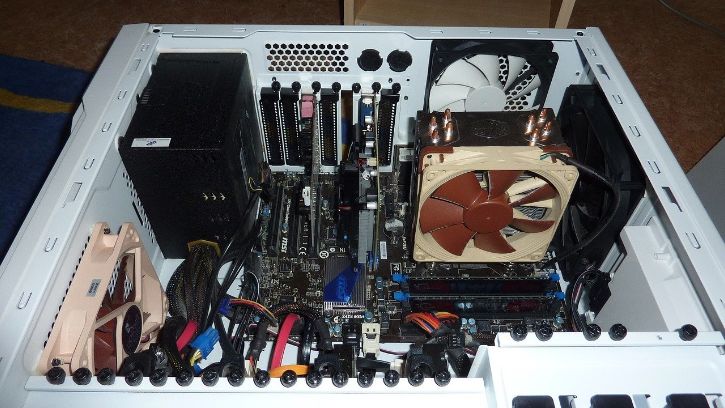
Now that you are ready, you may at present begin to teardown your PC, starting with your PC's side panel. Simply undo the screws holding the side panel on to the instance and carefully set it down to the side to have the PC open.
Depending on your case, it may only contain pollex screws which are easily loosened with your easily, or it may comprise an actual spiral for which y'all may need a screwdriver.
6. Unplug the PCI Express (PCIe / PCI-Due east) Cables
Now that the GPU is exposed, you may now proceed to unplug the PCI Limited (PCIe / PCI-East) cables that are currently connected to information technology. These cables are normally found continued to the side of the GPU. Just tug on them gently until they are removed from their slots.
Always call up to tug on those cables from the plastic connectors as to not damage the wires themselves. If you need a chip more back up, you lot can agree on to your GPU by its cooling fans or its backplate if it has one.
Anything else connected to it such as water-cooling hoses and GPU mounting brackets would exist up to you to exercise more research equally they are specialty parts and are normally not office of a general PC build.
7. Unscrew the GPU from the PC Case
Next is to unscrew the mounting screws of the GPU from the case. These screws are plant on the PCIe expansion holes near the back of the case. You volition need a screwdriver for this and so have one at the fix.
GPUs are usually held in place with 2 mounting screws on the case every bit the GPU occupies two of these expansion holes for its interface.
viii. Release the PCIe Expansion Slot Clips Holding the GPU
Adjacent is to release the PCIe expansion slot clips that are holding the GPU in place on your motherboard. These clips are unremarkably found where the GPU has its connecting pins. The style to undo these clips vary from motherboard to motherboard.
Some motherboards have clips that snap into place so all you need to do is snap them open again, while other motherboards require you to continuously apply pressure to the clips while you pull the GPU out. Make sure that the clips are completely undone to avoid damaging both your GPU and your motherboard.
9. Pull Out the GPU
Once you accept the clips unfastened or if you are holding the clips down, you tin now pull the GPU out of the PCIe expansion slot. Grab the GPU by its cooling housing and pull firmly as straight as possible. Brand sure to avoid grabbing on to the PCB side of the GPU to avoid adding oil and wet to it as it may cause corrosion.
Congratulations! You accept successfully removed the GPU from your PC and your PCIe expansion slot is at present free.
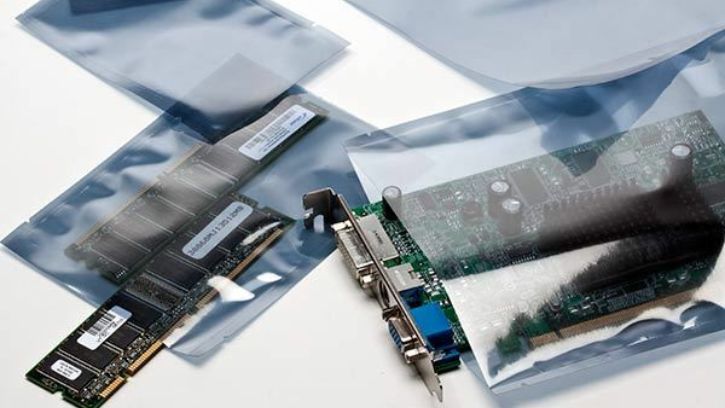
ten. Store the GPU in an Anti-static Bag
If you are simply cleaning your GPU, you may skip this step.
Now that the GPU is out, you lot can now shop information technology abroad and decide what to do with information technology at a later time. Store it in an anti-static bag to avert damaging information technology. GPUs are usually sold with an anti-static bag, so if you have the original box of your GPU, you may reuse that anti-static bag, likewise as the box itself to store your GPU.
Conclusion
While removing a GPU might seem like a simple chore, there is a lot of training involved in order to exercise it as safely and every bit smoothly equally possible. Ever consider these steps as all-time do so that you avoid breaking your GPU or anything in your PC and practice non wind upwards with a bigger neb than expected.
Now that yous accept your GPU out of your system, why non cheque out potential replacements for it past reading our articles on the all-time graphics cards for gaming? We likewise have another commodity that would fit your downgrading or rebuilding needs with the best low-profile graphics cards.
Source: https://diamondlobby.com/tech-guides/how-to-remove-a-gpu/
0 Response to "How To Remove A Graphics Card"
Post a Comment